Thursday, April 26

On the dot!

Given that we have four little boys between the two of us, we always love the opportunity plan a party for a little girl. Our adorable client Olivia was turning one and her parents wanted to do something extra special to mark this momentous occasion. Olivia loves watching bouncing balls and her mom, Wendy, loves to dress her up in polka dots.. so, nailing down a theme was pretty easy. Dots, of course! 


First, we first worked on a 'fingerprint' for the celebration. Some dots and dashes later, we created Olivia's first birthday's fingerprint.


Next came party essentials - we wrapped flatware in this adorable water color dot napkin and added the signature band. The pink and lime bands reflected the key colors of the event.


Water bottles bands were custom designed and together with a solid pink plate, they made a pretty set.


What's a party without a fun hat? We started with a solid pink hat, added the fingerprint and to give it a festive feel, we cut thin strips of  tissue paper and created a pom pom at the top. The kids looked SO adorable in them. 


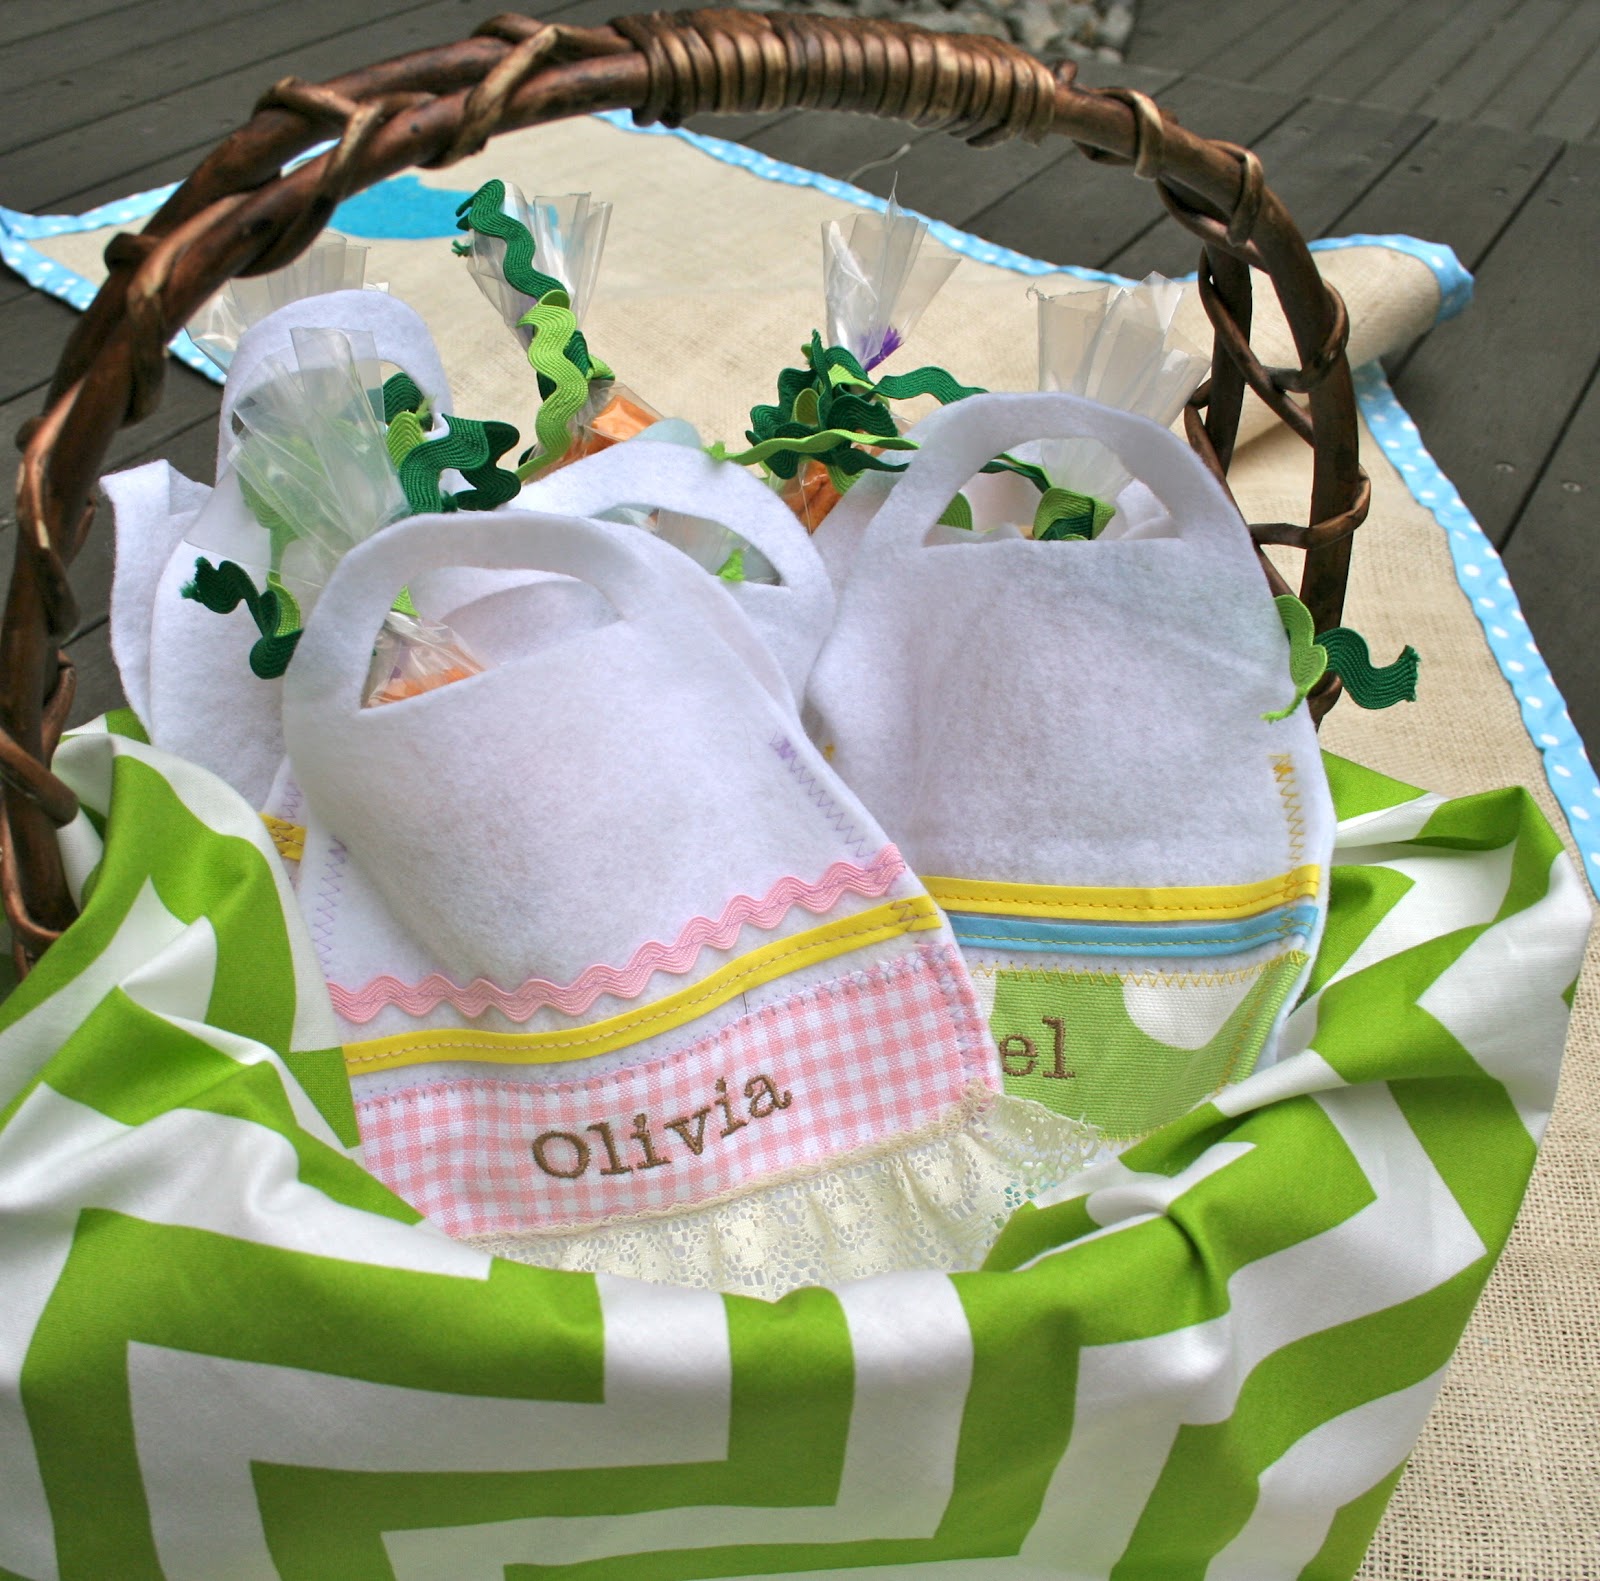
Olivia's mom is simply in love with arts and crafts. So she really resonated with our idea of having the favor bag be filled with materials for a craft that her little guests could make (with a bit of guidance from their parents of course!). The thought behind this was that it was a fun & engaging activity that the kids could do with their parents, all the while remembering the great time they had at the party. Each kit included instructions for making an origami lucky star (for girls) or boat (for boys) and sets of darling color coordinated craft paper (think dots, stripes, plaids). For the littlest babes, we assembled a sweet pinwheel making kit complete with a with a locking pin.


Then the instructions and materials were rolled into a scroll and tied with a bow. The favor bags were a glorious mix of  layered crepe paper, ribbon, scalloped craft paper, fine art paper and circles with the 'fingerprint' and the guest's name. These were simple yet dressy and looked very fun!

Then Olivia's mom ran with the whole dot theme and put together these cute bites:


In keeping with the theme, some of the food fare included M & M flowers (a hershey's kiss melted on a pretzel topped with m&ms), caprese salad on a stick, and cut fruit in dotted cups. She also had other food there as well such as sandwiches, broccoli bites, and mini peanut butter cracker sandwiches.


Olivia's mom wanted to have a special keepsake to remember her first big celebration and loved the idea that her guests could join in on the fun. We went to work by creating a cupcake sketch and then the guests added 'sprinkles' using their fingerprints to decorate the cake. We cannot wait to see the fully decorated cupcake!

Overall, everyone had a terrific time and they had a great time honoring Olivia's special day. It really was spot on!

Friday, April 20

A not so mellow yellow..

With the 'shower' season being upon us, we have been in love with the yellow and grey color story that is all the rage right now. Here are some of my new favorite loves:


I love the super fresh vibe that this mood board by Sweet Nothings Design exudes. Chevrons, adorable straws, flower lanterns..oh my! Love how they integrate the children's photos into the table backdrop.


I love the fabric runner on this table and the dot bunting. The simple table cloth really allows the food and bunting to be center stage.


Love this tablescape and chandelier. Such a darling shower found on the hostess with the mostess site.

Of course, if you decide to not go with a cake and instead want to do a cupcake display, then these cupcake liners are sweet. This site even has some interesting options for coordinating signage. Free, of course!


Last, but certainly not least, this is one of my new favorite images. The clean vintage feel of this decor is so welcoming that the grey comes through as very warm. My journey into yellow and grey made me revise my assumptions about this color story and itching to use it at our next event!

Monday, April 16

Woof!

This past weekend San Francisco celebrated dogs and kids at the 5th Annual Dog Fest. The event is a  fundraiser for my son's public elementary school.  We whipped up treats to fit the theme and certainly added some pizazz to the Bake Sale tent. The 'pup'cakes - vanilla cupcakes, vanilla frosting and chocolate paw prints - caused quite a bit of drool!


The paw prints was a cute mom-son project with my 6yo trying to make sure that no two were identical!

Thursday, April 12

the POP party!

A lovely friend was celebrating her pregnancy and we were asked to whip up something fun for her shower. So the ready to pop theme was born complete with a popcorn bar!
For the sweet tooth: mini popcorn tub cupcakes of course. We made chocolate cupcakes topped with mini marshmallows. Then we added a thin layer of vanilla frosting over the cupcakes - just enough for the marshmallows to stay put. Before placing the marshmallow, we dabbed yellow food coloring on them for the 'butter'. Lastly, after thinking about the color story , we picked a red and white theme with yellow accents (just like those adorable vintage popcorn boxes) for the cupcake liner (Printable for the cupcake liner will be available on our Etsy store very soon). After a couple of iterations this is what we designed:


Of course a ready to pop theme isn't complete if you don't have real popcorn so we tried our hand at making popcorn. After a couple of rounds of burnt popcorn, we got it right and were off to the races!  We settled on white cheddar, kettle corn, dark chocolate with sea salt, and then a spicy chili pepper popcorn. To add a bit of fun we named them on the signage Cheesy Mama, Sweet Mama(kettle corn), Yummy mama(dark chocolate with sea salt) and Spicy Mama. 


The mama to be simply loved the idea and even took the signage for a memento. The "Ready to Pop" theme was really perfect for this fun mama to be!

Saturday, April 7

Eggs-travaganza!

Oh the joys of Easter! We held our annual Easter egg hunt complete with Peter Rabbit himself (yes our resident bunny was ironically named Peter). We were so inspired by all the bunny silhouettes we were seeing that we decided for it to be our jumping off point. We had a terrifically fun time!


We designed the signage as a bunny silhouette superimposed on a lime polka dot background. We filled our jars with peeps that were dipped in chocolate and sprinkles, chocolate sea salt popcorn with robin eggs, packages of handmade marshmallows, and orange juice. We chose names for the food such as snickersnacks, bunny yummys, and cheeky peeps, etc. We had yellow pails as our lollipop arrangements (thank you craft foam and green paper shred..you are our heros!). We also used the green paper shred in the bottom of the apothecary jars to add a bit more of a finished touch.

Right now we are particularly in love with cherry blossom branches so we dressed them up with a few hanging eggs (a bit of a homage to my German heritage) and filled the vase with green paper shred. To give the table something fun for little hands, we made blue paper daffodils with center cups of m & m's (boy those were gone in no time!). We then finished it out with a back drop of our handmade Happy Easter bunting and lanterns and large felt eggs


To give it a bit more festive atmosphere, we designed this bunny butt bunting complete with a cotton tail! We LOVED hearing the kids giggle when their moms and dad's lifted them up to touch the bunny bums.


I am crazy for wrapped flatware (it must be my previous life in the hospitality field)! We, of course, integrated our bunny silhouette into our napkin rings. Off to the side, you can see our yellow and green 'eggs'. For these, I soaked yarn in a solution of flour and liquid spray starch (1 to 2 parts ratio) then wrapped it around a small balloon and let it dry. Then once dry, I popped the balloon. The kids loved going bowling with them. I made some big ones as well using regular sized balloons.


Being a mom and lover of state fairs (absolutely a throw back from growing up in Kentucky) I am almost compelled to have 'food on a stick' dishes. I made regular pancakes (thank you Paula Deen!) and then used my flower cookie cutter to shape them. Then, they were topped off with blue berries, syrup, and a sprig of mint. I used cheese picks since regular toothpicks were a bit too small.


One of our neighbors brought this lovely yogurt parfait dish. Sooo delish!


What is a party without cupcakes?! We chose nested eggs using chocolate shavings, robin eggs, and green icing as the 'grass'. So yummy that I can't remember how many I had.

 We had a great time with the photo booth. We are obsessed with chevrons so we of course chose that as our backdrop. We included lots of props (fire hat, mustaches, superman cape, frame, butterfly and bunny ears), which were so much fun!


We of course had the kids search for eggs (we leveled the playing field by challenging the older kids to find particular types of eggs). After wards, our craft table had tons of supplies for them to decorate their found eggs and die cut spring animals and eggs. We loved making googly eyed chicks and eggs. One little crafty genius even used a googly eye as the letter I in their name. Seriously precious!

No party is really complete without some fab favors. This year we chose to do embroidered bags in the shape of eggs. We had so much fun making these and the little ones loved seeing their names on their bags. We chose to fill them with goldfish carrots (see previous post) and packages with handmade marshmallows rolled in pastel colored sprinkles and tied with yellow raffia. 

All in all, it was so nice to see it all come together and an egg-cellent way to celebrate such a fun holiday. We hope the bunny stops at your house next. And make sure he brings some chocolate dipped peeps..those things are crazy good! Happy Easter from My Friend and I Events!

Wednesday, April 4

Blockprinting

Don't handmade pieces have such an appeal? Especially one that a child makes and can use.

Sometimes at parties that have mixed age ranges, finding engaging activities for older children can be a challenge. Block printing is a perfect party activity for school aged children! We started with block printing a dino on the front of the shirt and added a bit of color. The child's name went on the left sleeve.

This would work as such a fab favor for a dino themed event!


The wood block pictured is from a fair trade artisan workshop in India. We sent them sketches of the blocks we wanted - they were all outlines of animals that would appeal to kids. This isn't something that the block carver had done before, but he was up for the challenge and we think he did great. 

Monday, April 2

Perfect for Spring!

Ah! Burlap is SO hot and trendy that when we saw this fabric, we knew it would be the a great piece for our Easter dessert table! 

I made this very fun and cheery runner with just 5 ingredients - burlap, ribbon, a sheet of paper, acrylic paint and a sponge brush. I started with cutting out the silhouette on paper, sponged acrylic paint on the stencil, prettied up the edge with a coordinating ribbon and just like that.. we are on our way to having a very hoppy Easter! 


This is the first offering on our Etsy store! Check it out: http://www.etsy.com/listing/96685485/burlap-runner-for-easter

Sunday, April 1

Daddy Doody Kit

We were recently invited to a co-ed couple's baby shower. The couple who invited us has a great sense of humor so I thought I would mix it up with this:


 I started by downloading an Army font and camouflage artwork of which I used for the labels and the 'survival guide'. The survival guide was chock full of parenting cartoons and ended with a GI Joe quote. Then I sewed a apron ('for flying doody') and then using the embroidery function on my machine to emblazon his name and added a stripe applique.


For the Daddy Doody kit itself, I enclosed items that ranged from the practical to the absurd (tongs, clothes pins-for his nose, wipes case with their last name on it, diapers, outfit, rattle, rubber dish gloves, hand sanitizer, socks, face mask, pacifier with travel case, bottle, etc). On the outside of the kit, I listed everything on a contents list. On the top of the bucket, I had a label inscribed 'Open in case of a doody emergency'. I also enclosed a blanket from their registry to mix it up.  All in all the couple had a good chuckle and I had a fun night of crafting. Here's to being all you can be!